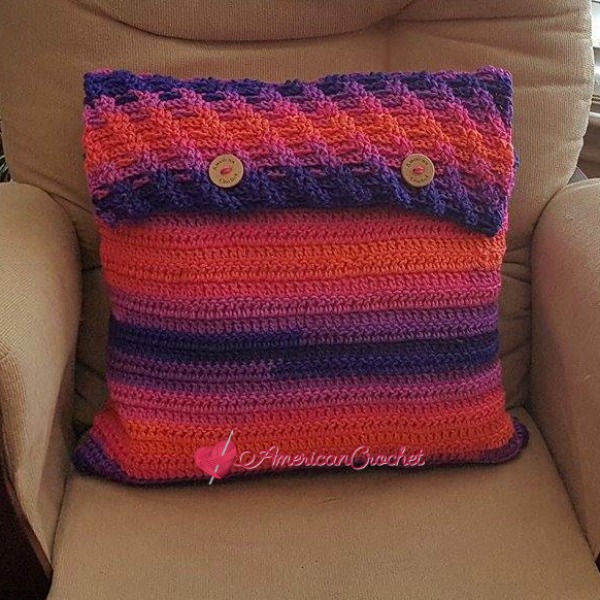
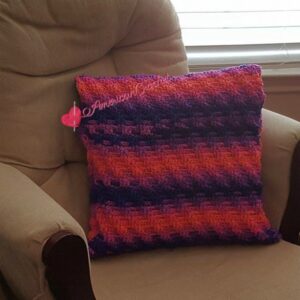
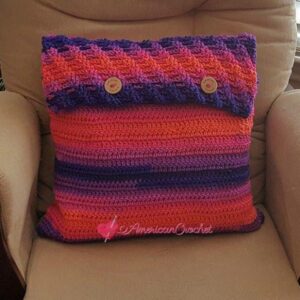
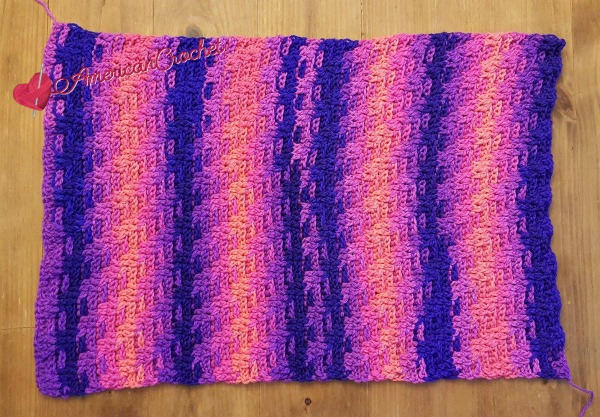
This Rainbow Twist Pillow Cover was designed for my Charity, Crafting A Rainbow Of Hope! This fun and colorful pillow cover spruces up any area of the home. It also makes for a great gift and/or donate several to your favorite charity.
>> SIGN UP FOR THE AMERICAN CROCHET NEWSLETTER! <<<
Thank you Red Heart for sending me this fun and awesome yarn.
I would love to see your projects in my Facebook Group and/or on Instagram!
Rainbow Twisted Pillow Cover ~ Crochet Pattern
REQUIREMENTS
Level of Difficulty
- Intermediate
Yarn
- Red Heart Super Saver Stripes, Flamenco Stripe; I used 708 yards
Hook and Notions
Measurement
- Laying flat 18-inches wide and 23-inches long (with flap laying out)
Gauge
- 3 patterns + 10 rows = 4-inches (front design)
- 12 stitches + 8 rows = 4-inches (back design)
Abbreviations
- Ch = chain
- Sc = single crochet
- Hdc = half double crochet
- Dc = double crochet
- FPdc = front post double crochet
- BPdc = back post double crochet
Pattern Notes
- Chain 2 counts as hdc at beginning of row unless otherwise stated.
Special Stitches
- Foundation Double Crochet (FDC) (Foundation Half Double Crochet) Chain 2, yarn over, insert hook into first chain (2nd from the hook), yarn over, pull up through the first loop on the hook (this is your first chain loop). With 3 loops on hook, yarn over, pull through 3. * Yarn over, insert your hook into the first chain loop, yarn over, pull up a loop (this is your second chain loop), yarn over, pull through 3. 2 fhdc completed. Repeat from * until you reach the desired number of fhdc.
I would love to see your projects in my Facebook Group and/or on Instagram! Share your progress on Instagram using #rainbowtwistedpillow
You can find more of my home patterns here
Crochet With Mistie! ~ Rainbow Twisted Pillow Cover
Instructions
FDC (see Special Stitches) 62
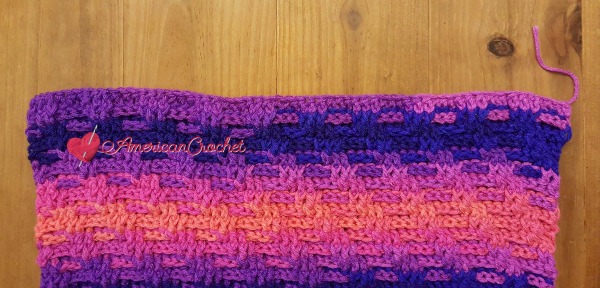
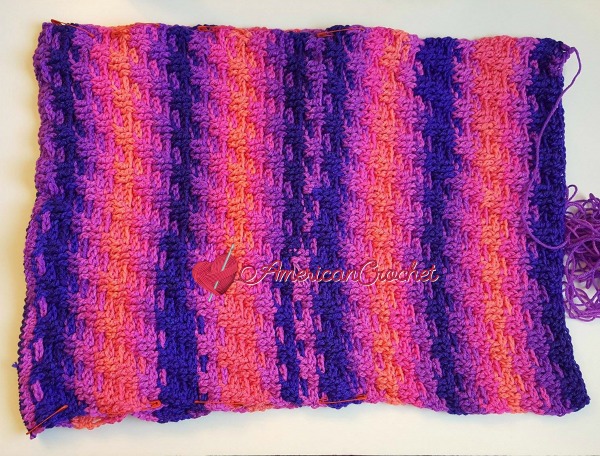
Row 1: Chain 2 (see pattern notes), *FPdc around each of the next 3 stitches, BPdc around each of the next 3 stitches,* repeat from *to* across, ending with a hdc in the top of the last stitch. Turn
Row 2: Chain 2, *FPdc around each of the next 2 stitches, BPdc around each of the next 3 stitches, FPdc around the next stitch,* repeat from *to* across, ending with a FPdc around the last stitch, hdc in the top of the turning chain 2. Turn
Row 3: Chain 2, *BPdc around each of the next 2 stitches, FPdc around each of the next 3 stitches, BPdc around the next stitch,* repeat from *to* across, ending with a BPdc around the last stitch, hdc in the top of the turning chain 2. Turn
Row 4: Chain 2, *BPdc around each of the next 3 stitches, FPdc around each of the next 3 stitches,* repeat from *to* across, ending with a hdc in the top of the turning chain 2. Turn
Row 5: Chain 2, *FPdc around the next stitch, BPdc around each of the next 3 stitches, FPdc around each of the next 2 stitches,* repeat from *to* across, work a FPdc around each of the last 2 stitches, hdc in the top of the turning chain 2. Turn
Row 6: Chain 2, *BPdc around the next stitch, FPdc around each of the next 3 stitches, BPdc around each of the next 2 stitches,* repeat from *to* across, work a BPdc around each of the last 2 stitches, hdc in the top of the turning chain 2. Turn
Rows 7-48: Repeat Rows 1-6
Fasten off and weave in ends.
Working on opposite end of FHDC. (This will be the backside)
Row 1: Chain 1, sc in the same stitch as the chain 1, sc in each stitch across. Turn (62 sc)
Row 2: Chain 2, hdc in each sc across. Turn (62 hdc)
Rows 3-4: Repeat Row 2
Row 5: Chain 3, dc in each hdc across. Turn (62 dc)
Rows 6-24: Repeat Row 5
Fasten off, be sure to leave long enough tail for sewing.
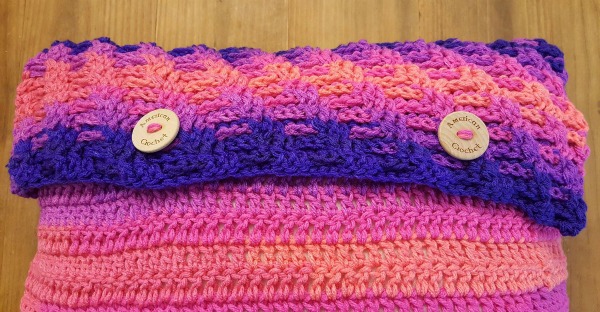
Lay cover flat (right side up). Start the fold where the backside of Row 1 begins. Pin the sides together.
Using the mattress stitch sew the sides together.
Fasten off and weave in ends.
Turn the pillow cover right side out. Insert the pillow form inside the cover. Place the buttons on the backside of the cover. (The image below is how I placed mine.) (It is up to you where the buttons are placed.)
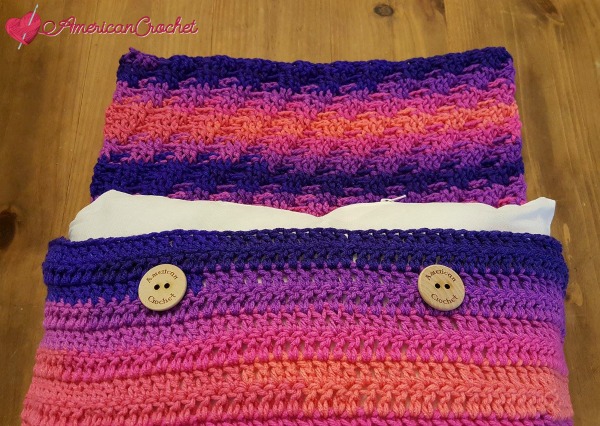
Sew the buttons on to the cover.
Pull the flap over and button through the perspective place.
Save this Rainbow Twisted Pillow Cover to your crochet boards on Pinterest!
Be sure to check back with us next week for a new pattern and/or pattern review. We hope you enjoy crocheting and hanging out with us this year! To learn more about my charity Click >>HERE<<
Don’t forget to share your projects in my Facebook Group and/or on Instagram!
>>> SIGN UP FOR THE AMERICAN CROCHET NEWSLETTER! <<<
Happy Hookin!
XO, Mistie

Copyright © Mistie Bush. All Rights Reserved. For personal use only. This pattern may not be copied, reproduced or distributed without express written permission from the designer and www.americancrochet.com You may not sell this pattern or profit from it in any way. You may sell items made from this pattern. However, you must link back to my American Crochet site to credit me for the pattern. You may not use my photos to sell your finished product. I have made every effort to ensure that this pattern is correct. If you have any questions or problems, you may email me at: mistie@americancrochet.com. Once your item is complete, share your work by posting a picture on my Facebook Group and/or Instagram!