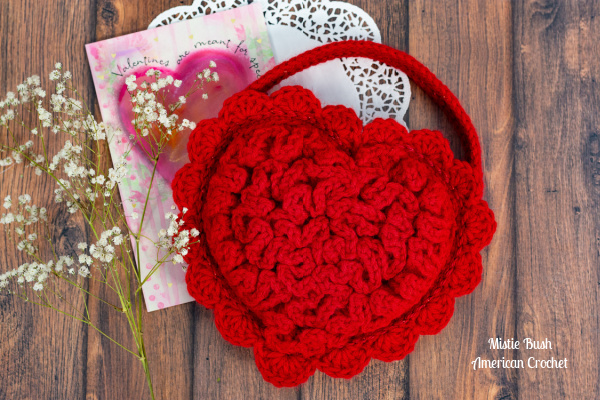
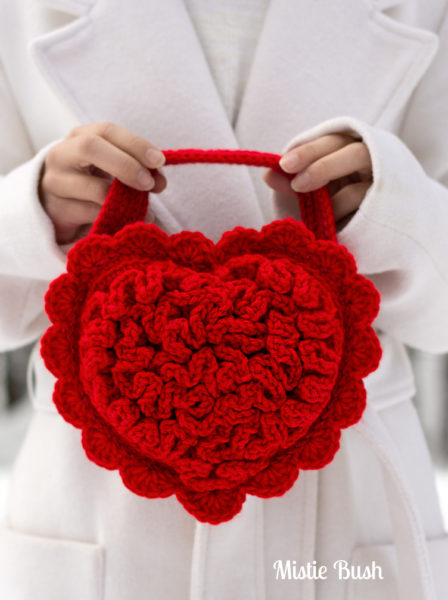
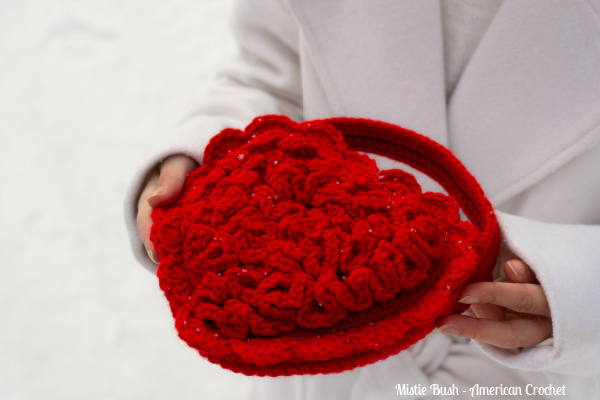
Welcome to a world of whimsy and charm with our “Sweetheart Crochet Clutch” pattern, specially designed for the little princesses in your life. This adorable heart-shaped clutch is the perfect accessory for any young girl, bringing a sprinkle of magic and a lot of love to her wardrobe.
Queue & Favorite on Ravelry OR Snag it on ETSY!
>>> SIGN UP FOR THE AMERICAN CROCHET NEWSLETTER! <<<

I would love to see your projects in my Facebook Group and/or on Instagram!
Play with colors! Whether she loves pink, purple, or a rainbow of hues, this pattern lets you tailor the purse to her favorite colors. You can even add a little sparkle to the purse for little added touch. A fun and cute heart shape that’s perfect for little hands. Ideal for storing small treasures, from hair clips to tiny toys.
You can find more of my crochet bags over HERE

This purse will always be available to follow on my site. Enjoy!
Disclaimer: This post contains affiliate links. When you purchase something through these links I earn a small commission. You do not pay any extra for the item you purchase.
SWEETHEART CROCHET CLUTCH
REQUIREMENTS
Level of Difficulty
- Intermediate
Yarn
- 200 yards. #4 worsted weight Red Heart Super Saver (Color A) Cherry Red or color of your choice
- 25 yards Caron Simply Soft Party in Red or complementing color to your main yarn
Hook and Notions
Measurement
- 6″ wide on the side and 8″ wide at widest point with scallops
Abbreviations
- Sc = single crochet
- Ch = chain
- Sl St = slip stitch
- Hdc = half double crochet
- Dc = double crochet
- Rsc = reverse single crochet
- St(s) = stitch(s)
- Sp(s) = space(s)
- BLO = back loop only
- Rnd = round
Clutch Pattern Notes
- Weigh your yarn cake: ________ grams
- Worked in the round
- 200 yards. I used #4 Worsted Weight Red Heart Super Saver yarn in “Cherry Red”. You do not have to use that color.
- 25 yards Caron Simply Soft Party in “Red”. This color should complement your main color.
- You may have to adjust your hook size depending on your tension. Rule of thumb always check your gauge.
- 6” wide on the side and 8” wide at widest point with scallops.
- Chain 1 at beginning of round does not count unless otherwise stated.
- Using RHSS it should measure approximately 6″ wide on the inside and 8″ wide at the widest point with scallops.
Special Stitches
BLO (Back Loop Only): Working in the back loop only of indicated stitch
Crab Stitch (Reverse Single Crochet):
- This stitch is distinctive; it looks ridged and makes a nice finishing option for crochet items. It looks great when worked as an edging using a contrasting or coordinating color.
- This is worked from left to right (or opposite direction)
- With Right Side of project facing you Ch 1, *insert hook into next st to right, yarn over and pull through, (2 loops on hook), yarn over and pull through both loops. * Continue working from * to * until you have reached the end of the project. Sl St into first ch 1 and fasten off. Weave in ends.
Video Tutorials if available will be on my YouTube Channel – Subscribe to my YouTube Channel!
Queue & Favorite on Ravelry OR Snag it on ETSY!
SWEETHEART CROCHET CLUTCH INSTRUCTIONS
Make 2:
With Color A
Round 1: 14 dc in magic circle, join with sl st. (14 dc) OR
Chain 3, work 13 dc in 3rd chain from hook; join with a slip stitch in 1st dc. (14 dc)
Note: The piece should measure 1 ¾” across with #4 yarn, or ¾” across with a #10 thread and a 1.5mm hook.
Round 2: Sk st, (hdc, dc) in next st (this will be the 1st stitch after the join), 4 dc in next st, 2 dc in next two sts, (2 dc, ch 1, 2 dc) in next st (bottom of the heart), 2 dc in each of the next 2 sts, 4 dc in next st, (dc, hdc) in next st, sk st, sl st into next st, sl st into each of the next 3 sts (last sl st will be worked in the join of rnd 1) last sl st counts as join. (22 dc, 2 hdc, 1 ch-1 sp, 4 sl sts)
Round 3: (hdc, dc) in first st, 2 dc in next 6 sts, dc in next 5 sts, (2 dc, ch 1, 2 dc) in ch-1 space at the bottom of heart, dc in next 5 sts (your first st may be hidden by the stitches you worked in the ch-1 sp so scoot them out of the way), 2 dc in next 6 sts, (dc, hdc) in next st (this is the first sl st you worked in the previous round), sl st in the next 2 sts (these will be the 2nd and 3rd slip stitches that you made at the end of the previous round), your 3rd sl st counts as the join, do not work into the final sl st of the round. (2 hdc, 40 dc, 1 ch-1 sp, 3 sl sts)
Round 4: Ch 1, skip the last sl st of previous round, (sc, hdc) in the first st (this is the first hdc from previous round), (hdc, dc) in next st, 2 dc in next 8 sts, dc in next 11 sts, (2 dc, ch 1, 2 dc) in ch-1 sp at bottom of heart, dc in next 11 sts, 2 dc in next 8 sts, (dc, hdc) in next st, (hdc, sc) in next st, sk st, sl st in next st, sl st into last sl st of round. (2 sc, 2 hdc 60dc, 1 ch-1 sp, 1 sl st)
Note: Your heart shape may be a little bit rippled. Don’t worry we will fix that starting in the next round.
Round 5: Sc in first sc from previous round, sc in next 32 sts, (sc, ch 1, sc) in ch-1 sp at bottom of heart, sc in next 33 sts, sl st into next st (skip last sl st of round). (68 sc, 1 ch-1 sp, 1 sl st)
Round 6: Ch 1, sk st, working in BLO, sc in next 13 sts, 2 sc in next st, sc in next 20 sts, (sc, ch 1, sc) in ch-1 sp, sc in next 20 sts, 2 sc in next st, sc in next 13 sts, join with a sl st into beginning ch. (71 sc 1 ch-1 sp)
Note: The piece should measure approximately 7” across at this point.
If you are making the front of the heart you will move to Rounds 7 and 8. If you are making the heart for the back of the bag you will end here, then trace the shape of the heart onto 2 pieces of plastic canvas. These will go into the front and back of the bag to give it better shape and structure.
Round 7: Sk 2 sts, 5 dc in next st, sk st, sl st in next st, [sk st, 5 dc in next st, sk st, sl st in next st] 6 times, sk st, 5 dc in next st, sk 2 sts, sl st in next st, sk 2 sts, 7 dc in ch-1 sp at the bottom of heart, sk 2 sts, (your first st will be under the shell you just worked do not miss it) sl st in next st, sk 2 sts, 5 dc in next st, sk st, sl st in next st, [sk st, 5 dc in next st, sk st, sl st in next st] 6 times, sk st, 5 dc in next st, sk 2 sts, sl st in next st. (16 5-dc shells, 17-dc shell)
Note: Now you will have the option to add a sparkly contrast color of yarn if you wish. If you prefer to stick with using your main color that’s great. You can move straight into this round without fastening off.
Drop Color A and fasten off.
Using Color B
Round 8: Sl st between rounds 6 and 7.
Fasten off and weave in ends.

Surface Slip Stitching
See the lines between each round? That is where you will be slip stitching through the fabric between Rounds 1, 2, and 3.
Making the Ruffle
Now you are working from the inside outward, work the sequence in each sl st: ([dc, ch 1] 3 times), move to the next sl st.
Joining the 2 Heart Pieces
Now that you have completed both hearts it is time to join them together. This creates the purse, but we will give it a little depth.
With the back side of the front of the purse facing you, sc through the back of the sl sts from Round 8. Begin at the end of the 3rd scallop from the center of the heart and work down and around the bottom and up the other side. You should have 47 sts on your purse. NOTE: The number doesn’t’ have to be exact but it should be positioned evenly along the bottom and sides of the purse, ch 1, turn. (47 sts)
Fasten off and weave in ends.
Position the back of the heart over the front part of the purse. You should have 23 sts on each side and 1 st at the very middle.
Use the crab stitch to join Row 4 to the back of the purse.
Fasten off and weave in ends.
Making the Strap
The strap can be as long or short as you would like. Stitch counts are unimportant, but this is the general idea that you will be shooting for:
This makes a short 12” Strap:
Leaving a 12” tail for sewing end of strap to purse and using a 3.25mm hook and tight tension.
Chain 51
Round 1: 3 sc in second ch from hook, sc in next 48 sts, 3 sc in last st of Row, continue working around end of chain and up other side, sc in next 48 sts, join with a sl st to first sc.
Round 2: Ch 1, 2 sc in each of next 3 sts, sc in next 48 sts, 2 sc in each of next 3 sts, sc in next 48 sts, join with a sl st to first sc.
With Color B (Remember this color change is optional)
Round 3: Using tight tension, sl st around the edge of the entire strap. This Round will help to reduce the amount of stretch in the strap.
Fasten off leaving 12” tail for sewing one of the straps to the side of the bag.
Don’t forget to share your projects in my Facebook Group and/or on Instagram!
>>> SIGN UP FOR THE AMERICAN CROCHET NEWSLETTER! <<<
Happy Hookin!
XO, Mistie

