How to Join Your Riverwood Squares – Two Simple Crochet Seam Methods 🧶
Now that we’ve completed 13 out of the 24 squares in the Riverwood Square CAL – Modern Version, it’s a great time to talk about how to join your squares together. Whether you like to join-as-you-go or prefer to wait until all your squares are finished, this post will walk you through two easy and effective ways to join your squares: the Slip Stitch Seam and the Single Crochet Seam.
You can use either method across the entire blanket or mix them depending on the look you want. The goal is to help your squares come together beautifully and securely — while keeping the focus on your gorgeous stitchwork.
Disclaimer: This post contains affiliate links. When you purchase something through these links I earn a small commission. You do not pay any extra for the item you purchase.
Sign up to receive exclusive pattern releases, step-by-step instructions, and helpful tips to guide you through this fun and engaging crochet-along! Click here to join!
🧶 How to Crochet Squares Together – Prep Tips Before You Join
Before you grab your hook and seam everything together, here are a few simple things you can do to help your finished piece come out neat, balanced, and frustration-free.
✨ 1. Block all of your squares first.
Blocking helps ensure each square is the same size, flattens any curling, and creates clean edges. Your joins will look much more polished — and your entire project will sit more evenly.
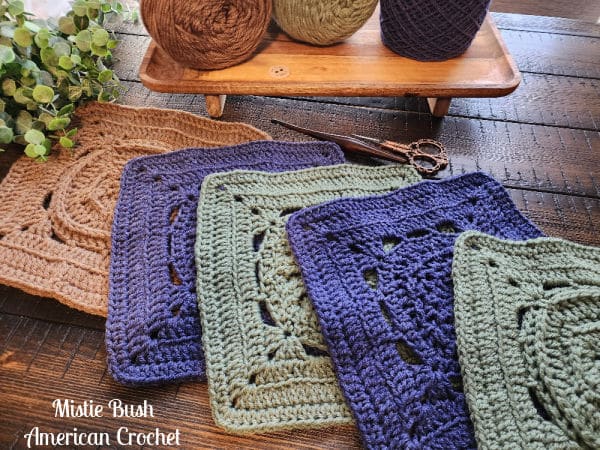
🧩 2. Lay out all your squares ahead of time.
Arrange your squares in the order you’d like to join them before you begin. This gives you a chance to step back, play with color or texture placement, and make adjustments before committing. There’s nothing worse than realizing a square is out of place several joins in!
Once you have done these two things, you are ready to start joining your crochet squares.
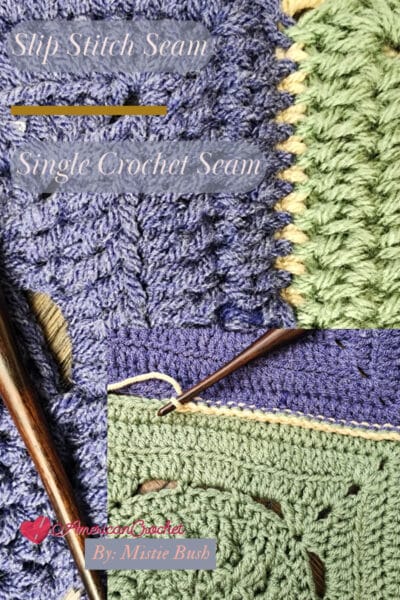
✨ Method 1: Slip Stitch Crochet Seam (Flat & Clean)
The Slip Stitch Seam is ideal if you want a neat, flat seam that doesn’t distract from your stitch texture. It’s especially great if you’re going for a modern, seamless finish.
✔ How to Work the Slip Stitch Seam:
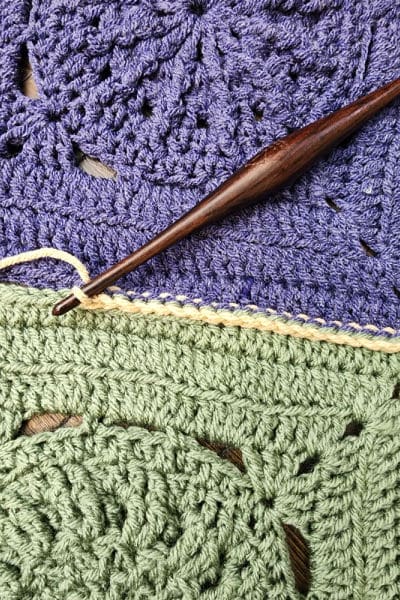
- Place two squares together with right sides facing each other (or wrong sides together if you prefer the ridge on the front).
- Insert your hook through both loops of the edge stitch on each square.
- Slip stitch through both layers, one stitch at a time.
- Continue across the edge until you reach the end.
- Fasten off and weave in ends.
This creates a minimal join and keeps your seams tidy — perfect for those who prefer a subtle finish.
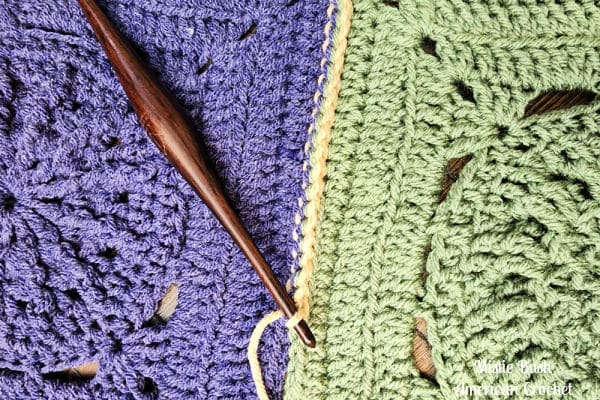
💫 Method 2: Single Crochet Seam (Visible & Decorative)
If you love a bit of texture or a framed look around each square, the Single Crochet Seam is for you. It adds a slightly raised edge and a bit of visual separation between squares.
✔ How to Work the Single Crochet Seam:
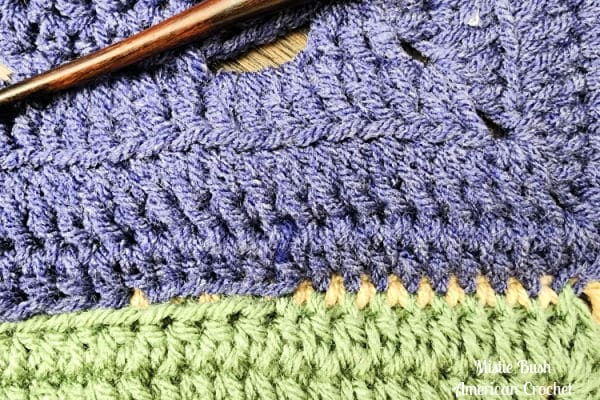
- Place two squares together with wrong sides touching (so the seam sits on the front).
- Insert your hook through both loops of the edge stitch on each square.
- Single crochet through both layers across the entire edge.
- Keep your tension even so your seam doesn’t pull.
- Fasten off and weave in ends.
This method is slightly thicker than slip stitching and gives a handcrafted, bold look that really stands out in your finished blanket.
📌 Joining Tips:
- Block your squares first for best results! This ensures they’re the same size and shape for a clean join.
- Be sure each square has the same stitch count on the joining edges.
- Use stitch markers to line up the corners before joining.
- Try both methods on scrap swatches if you’re unsure which look you prefer!
📸 Share Your Progress!
As you begin joining your squares, we’d LOVE to see your progress!
✨ Use #RiverwoodSquareCAL and tag @AmericanCrochet on YouTube, Instagram or TikTok.
✨ Share in our Facebook group to inspire others and cheer each other on.
✨ Save this post to Pinterest so you can easily come back when you’re ready to join the full blanket!
Happy Hookin!
XO, Mistie

All patterns are designed by Mistie Bush of American Crochet. I'm passionate about creating patterns that are as enjoyable to make as they are beautiful to wear — clear, confidence-building, and crafted with you in mind. Whether you're just finding your rhythm or adding to a well-loved collection, I'm so glad you're here. Have a question? I'd love to help — reach out anytime before or after your purchase.
Disclaimer: This post contains affiliate links. When you purchase something through these links I earn a small commission. You do not pay any extra for the item you purchase.
Happy crocheting, Mistie Bush American Crochet
Chat about this page with AI
Opens the AI in a new tab with a prompt that references this page. You can edit the prompt before sending. Claude and ChatGPT support prefill; Gemini and Perplexity may require pasting the prompt.