Quick Easy Luxe Lace Gift Card Holder | Free Crochet Pattern
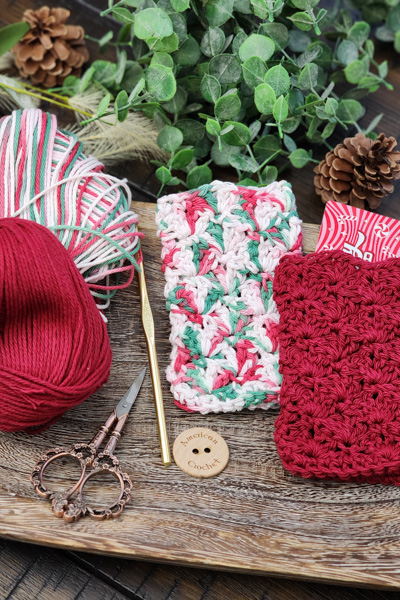
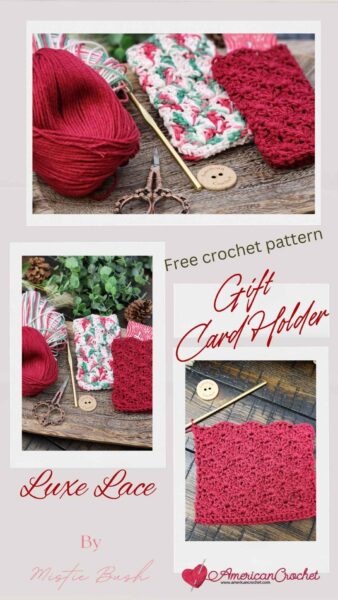
This elegant Luxe Lace Gift Card Holder pattern is a wonderful way to add a handmade touch to your gift-giving. The intricate lace-like design makes it suitable for any occasion, whether you’re celebrating a birthday, anniversary, or just showing someone you care. Its compact size is perfect for slipping in a gift card or a small note, offering a thoughtful presentation that’s both practical and beautiful.
Sign up for my newsletter to receive updates on new patterns, exclusive discounts, and crochet tips! Click here to join!
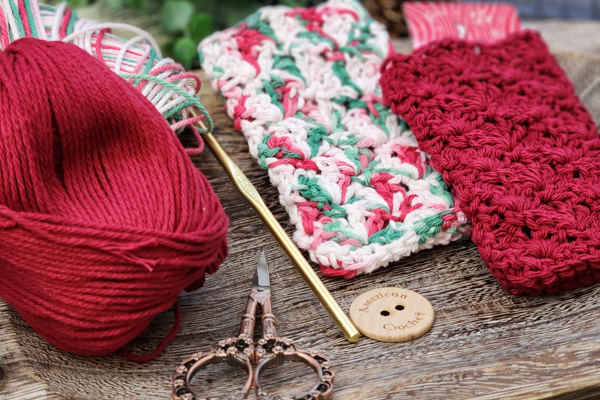
For this pattern, consider using a durable and soft yarn that complements the lace detailing. A worsted weight or light cotton yarn works wonderfully, ensuring the card holder retains its structure while showcasing the delicate stitch pattern. Customize the design by choosing colors and embellishments that match the recipient’s personality or the theme of the celebration.
Here are some more of the 2017 Valentine Box of Chocolates Gift Hop crochet patterns:
Creamy Truffle Heart Coaster
Strawberry Truffle Dish Towel
Strawberry Sherbet Truffle Coaster
Valentine Chocolate Treats
Marshmallow Sweet Hearts Basket
Sweet Kisses Mini Sock
Buttons And Hearts Jar Cozy
Disclaimer: This post contains affiliate links. When you purchase something through these links I earn a small commission. You do not pay any extra for the item you purchase.
Strawberry Delight Gift Card Holder
REQUIREMENTS
Terminology
- US Terms
Level of Difficulty
- Beginner/Intermediate
Yarn
- Crafter’s Secret cotton, 120 yards. (I used roughly 20-25 yards)
Hook and Notions
- Size Hook: H (5.0mm)
- Scissors
- Blunt Needle
- Stitch Markers
- Measuring Tape
Measurement
- Laying Flat: 6″ wide by 5″ tall
Gauge
- 9 sc = 2″
How to Crochet A Gauge Swatch
Creating a gauge swatch helps ensure that your project will turn out with the intended size and fit. It’s also a great way to get comfortable with the stitches used in this pattern, allowing you to refine your technique for a polished finish.
Abbreviations
- Ch = chain
- Dc = double crochet
- Sc = single crochet
- sc blo = single crochet back loop only
- st(s) = stitch(s)
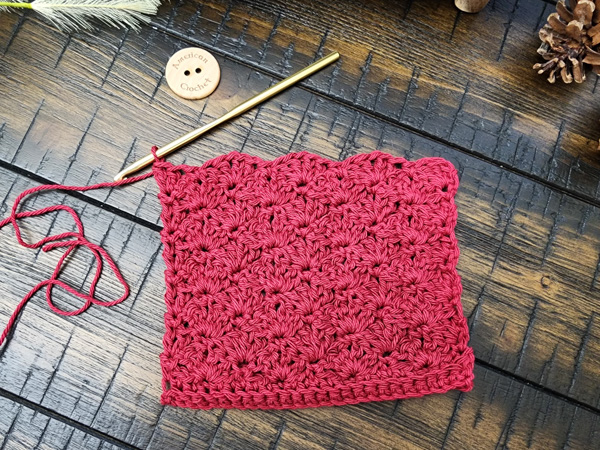
Special Stitches
- Shell – work (2 dc, ch 1, 2 dc) in indicated stitch.
- FHDC – (Foundation Half Double Crochet) Chain 2, yarn over, insert hook into first chain (2nd from the hook), yarn over, pull up through the first loop on the hook (this is your first chain loop). With 3 loops on hook, yarn over, pull through 3. * Yarn over, insert your hook into the first chain loop, yarn over, pull up a loop (this is your second chain loop), yarn over, pull through 3. 2 fhdc completed. Repeat from * until you reach the desired number of fhdc.
Card Holder Pattern Notes
- Chain 1 at beginning of row counts as a single crochet.
- Worked from side to side.
- FHDC is optional. I give you two methods for starting out.
You can purchase the pattern from my online shops below:
- 🛒 Grab from the American Crochet Shop
- 🛒 Get it on Ravelry
Luxe Lace Gift Card Holder Instructions
FHDC 25 OR Ch 26
Row 1: (Working in the back bump – this is only if you chained 26) sc in each stitch across (25 sc)
Row 2: (working in BLO) Ch 1, sc in each st across. (25 sc blo)
Row 3: Ch 1, sc in same st, *sk next 2 sts, shell in the next st, sk 2 sts, sc in the next st;* repeat from *to* across, until there are 3 sts remaining, sc in the last st. (4 shells, 5 sc)
Row 4: Ch 1, 3 dc in same st, sk 2 sts, *sc in ch-1 sp, sk 2 sts, shell in sc, sk 2 sts;* repeat from *to* across, ending with 2 dc in last st. (3 shells)
Row 5: Ch 1, sc in same st, *sk next 2 sts, shell in the sc, sk 2 sts, sc in the ch-1 sp of the previous shell;* repeat from *to* across, until there are 3 sts remaining, sc in the last st. (4 shells, 5 sc)
Repeats
Repeat Rows 4-5 seven more times. You should have 10 shells or until your pieces measures 5 inches tall.
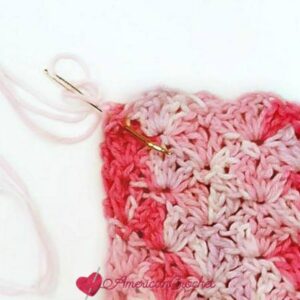
Fasten off leaving 18 inch tail for sewing the side and end.
Assembling the Card Holder
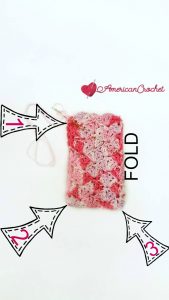
Now you will need a sewing needling and stitch markers
Step One: Fold the piece in half with Wrong Side facing out. I used my stitch markers to hold the sides together. This makes it easier to sew together.
Step Two: (Using the 18 inch tail and your preferred sewing stitch) (I chose the mattress stitch) Sew the side and end together. Be sure to leave the top open for the gift card to be inserted. Fasten Off.
Step Three: Turn the card holder Right Side Out. Now you can put the gift card inside and give it to that special person.
Don’t forget to share your projects in my Facebook Group and/or on Instagram!
>>> SIGN UP FOR THE AMERICAN CROCHET NEWSLETTER! <<<
Happy Hookin!
XO, Mistie

All patterns are designed by Mistie Bush of American Crochet. I'm passionate about creating patterns that are as enjoyable to make as they are beautiful to wear — clear, confidence-building, and crafted with you in mind. Whether you're just finding your rhythm or adding to a well-loved collection, I'm so glad you're here. Have a question? I'd love to help — reach out anytime before or after your purchase.
Disclaimer: This post contains affiliate links. When you purchase something through these links I earn a small commission. You do not pay any extra for the item you purchase.
Happy crocheting, Mistie Bush American Crochet
Chat about this page with AI
Opens the AI in a new tab with a prompt that references this page. You can edit the prompt before sending. Claude and ChatGPT support prefill; Gemini and Perplexity may require pasting the prompt.